QR code sticker design sits at the intersection of graphic design, print production, mobile usability, and campaign measurement, which is why small mistakes often cause expensive failures in the real world. A QR code sticker is a printed adhesive label containing a machine-readable matrix barcode that opens a URL, file, payment flow, app action, or other digital destination when scanned by a smartphone camera. In practice, good QR code sticker design means more than generating a code and placing it on vinyl. It requires balancing scan reliability, material durability, visual branding, placement context, adhesive performance, and the user’s motivation to scan. I have worked on sticker programs for retail shelves, restaurant packaging, warehouse labeling, event signage, and outdoor asset tags, and the same lesson repeats: if the code is technically valid but physically hard to scan, the campaign underperforms.
The topic matters because stickers are one of the most flexible ways to deploy QR codes across packaging, windows, walls, products, mailers, and equipment without reprinting the base item. They are also relatively low cost, fast to produce, and easy to test. Yet the convenience of stickers creates risk. Teams often ignore substrate glare, undersized modules, weak contrast, or poor calls to action, then blame customer behavior when scans stay low. A high-performing QR code sticker design must be readable from the expected distance, survive the environment, communicate clear value, and direct users to a fast mobile page. As the hub page for QR code sticker design, this guide covers the standards, design choices, materials, print decisions, testing methods, and operational practices that determine whether a sticker simply looks good or consistently gets scanned.
Core principles of QR code sticker design
The first rule is straightforward: scan performance always outranks decoration. A QR code works by encoding data in a grid of modules, and every printed choice affects whether the camera can distinguish those modules cleanly. Start with strong contrast, typically black on white or another dark-on-light pairing. Light codes on dark backgrounds can work in controlled cases, but they are less forgiving, especially under dim lighting or on lower-quality phone cameras. Preserve the quiet zone, the blank margin around the code, because scanners rely on that margin to identify the symbol boundary. As a practical baseline, use a quiet zone at least four modules wide on all sides and avoid placing text, borders, illustrations, or die-cut edges too close.
Size is the second nonnegotiable factor. Sticker dimensions should be set by scanning distance and use case, not by aesthetic preference alone. For close-range packaging or tabletop applications, many teams use codes around 0.8 to 1.2 inches square, but that is only safe when the destination URL is short, print quality is high, and the sticker will be scanned from near arm’s length. For posters, windows, and wall placements, larger is better, and I regularly recommend prototypes at several sizes before approving a production run. Use dynamic QR codes when possible, because they let you update the destination without replacing the sticker and provide analytics on scans, locations, devices, and time patterns through platforms such as Bitly, QR Code Generator Pro, Uniqode, or Beaconstac.
Error correction is important, but it is often misunderstood. Higher error correction allows a code to remain scannable when part of it is obscured, scratched, or stylized, yet it also increases data density. On stickers, that tradeoff matters because denser codes need larger physical size for reliable printing. Level M or Q often balances resilience and readability well, while level H is useful if you plan to place a logo in the center or expect surface wear. However, adding a logo should never cover finder patterns or alignment patterns, and it should be tested on multiple phones, including older devices. Good QR code sticker design uses branding carefully and treats every artistic modification as a performance risk that must be validated, not assumed.
Visual design, branding, and user motivation
A QR code sticker should look intentional, but the visual system must support the scan rather than compete with it. The most effective designs answer three questions immediately: what is this, why should I scan it, and what happens next. That means adding a concise call to action near the code, such as “Scan for setup guide,” “Scan to view menu,” or “Scan for warranty registration.” Generic instructions like “Scan me” often underperform because they do not communicate benefit. In client tests on packaging and countertop displays, clearer value statements consistently improved scan rates, especially when users had only a few seconds of attention. The destination should also match the promise exactly. If the sticker says “Scan for installation video,” the page should open that video directly, not a generic homepage.
Branding can improve trust and recognition when used with restraint. Matching brand colors in the surrounding label, adding a small logo, and using typography consistent with the package or environment helps the sticker feel legitimate rather than improvised. The best approach is to keep the code itself simple and use branded elements around it. Rounded modules, gradients, and decorative frames can work, but each extra layer reduces tolerance. Metallic inks, glossy laminates, holographic effects, and low-contrast brand palettes are common reasons that attractive stickers fail in stores. If your brand uses light pastel colors, apply them to the label background or supporting graphics while keeping the code in a scanner-friendly dark color. Good design protects trust, but great QR code sticker design protects trust and utility at the same time.
Placement within the sticker matters as much as overall appearance. Leave room for the code, the quiet zone, the call to action, and any required legal or instructional copy. Crowded layouts force designers to shrink the code too much. A simple hierarchy usually performs best: headline or action phrase, code, short explanatory line, and optional URL fallback. Including a short readable URL can help users who cannot scan due to damaged cameras, strict workplace device policies, or accessibility needs. In regulated contexts such as healthcare devices or industrial assets, include plain-language identification and support contact details where appropriate. The sticker is not just a graphic artifact; it is a user interface printed on an adhesive substrate.
Materials, adhesives, and finishing choices
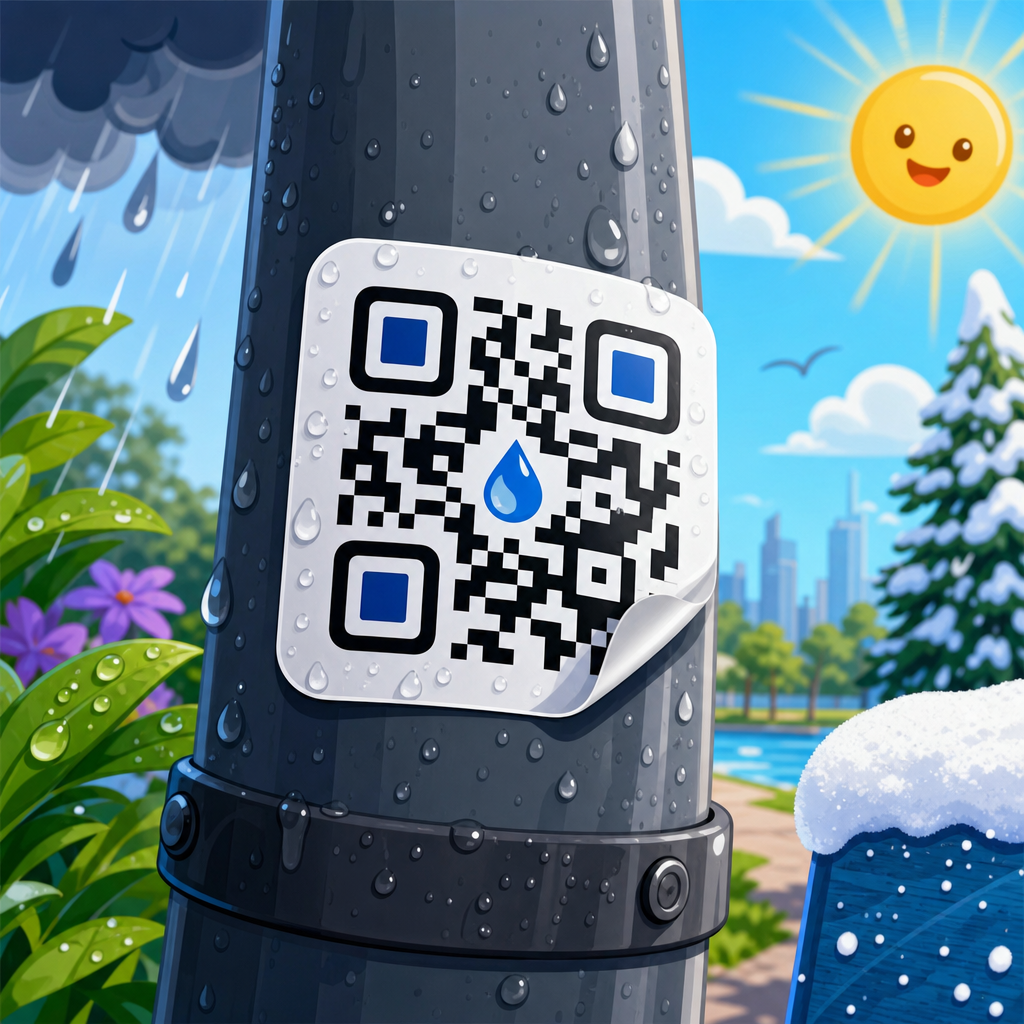
Material selection determines whether a QR code sticker survives its environment long enough to deliver value. Paper stickers are economical for short-term indoor use on cartons, mailers, inserts, and temporary promotions. For moisture, abrasion, oil, cleaning chemicals, UV exposure, or temperature swings, move to synthetic facestocks such as polypropylene, polyester, or vinyl. In warehouses and manufacturing sites, polyester labels with permanent acrylic adhesive usually outperform paper because they resist tearing and maintain readable edges. For refrigerated food packaging, test adhesive behavior under condensation. For windows, use adhesives designed for glass and consider whether the sticker will be applied inside or outside, since that changes weather exposure and readability through reflections.
Lamination and coating choices have direct scanning consequences. Gloss finishes can look premium, but they increase glare under store lighting, sunlight, and camera flash. Matte laminates often scan better because they diffuse reflections and preserve contrast. If the sticker will be handled frequently, a protective laminate can prevent scratches that damage modules, but it must be paired with enough code size and contrast to remain readable. Die-cut shapes should never cut into the quiet zone or create decorative borders that visually interfere with the symbol edge. Tamper-evident materials are useful for warranty seals, compliance labels, or asset tags, but the destruct pattern should not distort the code before the user is expected to scan it. Design for the full lifecycle, not just the first day after application.
| Use case | Recommended material | Typical finish | Key design note |
|---|---|---|---|
| Indoor packaging | Paper or polypropylene | Matte | Prioritize contrast and a clear call to action |
| Restaurant takeaway containers | Polypropylene | Matte or soft-touch | Test grease, condensation, and curved surfaces |
| Outdoor equipment labels | Polyester or cast vinyl | UV-resistant matte laminate | Use larger codes and higher error correction |
| Retail window decals | Vinyl with glass-safe adhesive | Matte | Avoid glare and account for viewing distance |
| Warehouse asset tags | Polyester with permanent acrylic adhesive | Protective laminate | Plan for abrasion, cleaners, and long service life |
Adhesive choice deserves more attention than it gets. Removable adhesive is useful for seasonal campaigns, short-term retail promotions, and rented event spaces because it reduces residue and removal labor. Permanent adhesive is better for equipment, long-term signage, and situations where edge lift would ruin scans. Low-surface-energy plastics, powder-coated metals, corrugate, and textured walls can all reduce bond strength, so test the actual substrate before volume printing. I have seen technically perfect labels fail because they curled at the corners on cold coolers or separated from textured packaging after a few days on shelf. In those cases, the issue was not code generation; it was material engineering. Successful QR code sticker design connects visual layout with substrate compatibility and environmental durability.
Print production, sizing, and quality control
Even strong designs fail when print execution is poor. The code must be produced at sufficient resolution for the chosen size. Vector artwork is preferred because it scales cleanly, while raster images can soften edges and introduce artifacts. If a printer requests bitmap files, provide high-resolution output and verify that resizing will not occur in prepress. Thermal transfer, digital toner, inkjet, screen printing, offset, and flexographic printing can all produce workable QR stickers, but each method has tolerances. Dot gain, ink spread, and substrate absorption can close small gaps between modules, making dense codes unreadable. Ask for hard proofs or production samples on the final material, not just on office paper. What scans at a desk may fail under retail lighting or after lamination.
Minimum size should be based on module count, print process, and intended distance. A practical rule used in many deployments is a scanning distance to code size ratio of about 10:1, though real conditions vary with camera quality and angle. If a code will be scanned from 20 inches away, start testing at about 2 inches square, then adjust based on density and environment. Shorter encoded data means fewer modules and more flexibility, which is another reason dynamic codes are useful. Before approving a job, scan from multiple distances and angles using iPhone and Android devices, older cameras, and third-party scanner apps. Test in daylight, fluorescent light, warm indoor light, and low light. Reliability should be measured under realistic conditions, not ideal ones.
Quality control should include variable inspection points. Confirm the encoded destination, verify there are no redirects that slow the landing page, and ensure print batches remain consistent from start to finish. For larger runs, request inline or sample-based barcode verification if the printer offers it. While QR verification standards are more common in industrial labeling than consumer marketing, the discipline is useful everywhere. Also check color consistency, cut accuracy, laminate alignment, and adhesive performance after twenty-four to seventy-two hours. For serialized or versioned stickers, maintain a tracking sheet that ties each batch to a campaign, destination URL, and placement date. That operational detail matters later when you need to troubleshoot low scan rates or retire outdated content without confusion.
Placement strategy, analytics, and ongoing optimization
The best sticker design still needs the right physical placement. Position the code where users naturally pause and where phones can approach without awkward angles. On packaging, avoid seams, corners, and highly curved surfaces that distort the code. On doors and windows, mount at a comfortable scanning height and consider reflections at different times of day. On machinery or asset labels, keep the code clear of fasteners, grime paths, and frequent abrasion zones. In public spaces, provide enough surrounding context that the sticker does not look suspicious or unsafe to scan. People are more likely to scan when they understand the source and expected outcome, which is why co-branding, clear language, and destination transparency matter.
Analytics turn QR code sticker design from a one-time print task into a measurable system. Use dynamic links with UTM parameters so traffic appears clearly in Google Analytics 4, Adobe Analytics, or your CRM. Compare scan volume by placement, size, call to action, and material finish. In one retail program I managed, identical offers produced very different results because shelf-edge stickers outperformed product-side stickers by a wide margin; shoppers noticed the former earlier in the decision path. Time-of-day patterns, repeat scans, bounce rates, and downstream conversions reveal whether the issue is sticker visibility, scan friction, or landing-page mismatch. If scans are high but conversions are weak, the sticker may be doing its job while the mobile experience fails.
Optimization should be continuous. A good hub strategy is to standardize baseline specifications for indoor, outdoor, packaging, event, and asset-label applications, then document what changed and why after each campaign. Replace vague creative debates with measurable criteria: scan success rate, lift in engagement, dwell time on destination pages, and completion of the target action. Refresh worn stickers before they visibly degrade, and sunset outdated URLs through redirects or platform controls. Most importantly, treat QR code sticker design as part of a broader printed touchpoint system linked to landing pages, tracking, accessibility, and maintenance. If you want better performance across packaging, signage, labels, and promotional assets, audit your current stickers, test them in the real environment, and build the next round from proven specifications rather than assumptions.
Frequently Asked Questions
What makes a QR code sticker design actually work in real-world conditions?
A QR code sticker works well when it is designed for the messy realities of printing, placement, lighting, distance, and smartphone camera behavior, not just for how it looks on a screen. In practice, that means using a high-contrast code, preserving the required quiet zone around the symbol, choosing a size that matches the expected scanning distance, and placing the sticker on a reasonably flat, visible surface. A code that looks sharp in a design mockup can still fail if it is printed too small, distorted to fit a layout, wrapped around a curved object, covered by glare, or surrounded by visual clutter that makes the code harder for cameras to isolate.
Successful QR code sticker design also depends on the relationship between the code and the user experience around it. People need to notice it, understand what will happen when they scan it, and trust the destination. That is why strong designs often include a clear call to action such as “Scan to view menu,” “Scan for setup guide,” or “Scan to pay,” rather than showing the code alone. The sticker should also feel intentional within the brand system without compromising scan reliability. In other words, design supports function, but function comes first. If a branded treatment lowers readability, it is usually the wrong tradeoff.
Finally, real-world performance should always be validated through testing. Print samples at actual size, apply them to the intended material, and test on multiple devices under different conditions before approving production. Check scans in bright light, low light, at slight angles, and after the sticker has been handled. Many expensive failures happen because teams approve a QR sticker based on a digital proof instead of field testing the printed result where customers will actually use it.
How large should a QR code sticker be for reliable scanning?
The right size depends on scanning distance, print quality, error correction level, and how much data is encoded, but the safest rule is to prioritize readability over compactness. A common baseline is to make the QR code at least around 1 x 1 inch for close-range use, though larger is often better, especially in public environments where users are scanning quickly or from awkward angles. If the sticker will be placed on packaging, equipment, windows, counters, or posters, size should be chosen based on how far away the user is expected to stand when scanning.
A useful practical guideline is that the scanning distance should be roughly ten times the width of the code. For example, if a person will scan from about 10 inches away, a 1-inch code may be acceptable. If they will scan from several feet away, the code needs to be much larger. This is especially important for stickers used on walls, storefronts, vehicles, displays, or industrial assets where users may not be able to get close enough for a tiny code to resolve properly. Designers should also remember that dense QR codes containing long URLs or extra parameters require more modules, which means the same physical size can become harder to scan.
The best way to size a QR code sticker is to test the exact code at final print dimensions, on the actual substrate, in the real placement scenario. A short dynamic URL generally allows a cleaner, less dense code than a long static URL, which improves reliability. If there is any uncertainty, increasing the printed size is usually one of the simplest and most effective ways to improve scan performance.
Can you add colors, logos, and branding to a QR code sticker without hurting scanability?
Yes, but only within strict functional limits. Branded QR code stickers can look polished and on-brand, yet the code still needs strong visual contrast and an intact structure for smartphone cameras to read it quickly. The safest approach is a dark foreground on a light background, ideally close to black on white, while avoiding low-contrast combinations such as pastel-on-pastel, metallic inks, gradients across key modules, or glossy finishes that create reflections. Design customization should support recognition, not compete with machine readability.
Adding a logo in the center is common, but it reduces available data area and must be handled carefully. If a logo is used, it should be small, placed centrally, and tested with an appropriate error correction level. Even then, higher error correction is not permission to over-design the code. Rounded modules, decorative frames, and brand colors can work, but only if the core finder patterns, alignment patterns, module spacing, and quiet zone remain clear. Designers should never stretch, compress, rotate oddly, or crop a QR code to fit a layout. The code itself is not just an image; it is a machine-readable structure that depends on geometric integrity.
It is also smart to think beyond the code and brand the sticker through surrounding design elements. A branded border, icon, headline, or call to action can often deliver a stronger visual identity than aggressively modifying the code itself. This usually gives a better balance between aesthetics and performance. The final test is simple: print it, scan it on multiple phones, and compare it against a plain version. If the customized version scans slower or less reliably, the branding treatment needs to be simplified.
What print and material choices matter most for QR code sticker performance?
Print quality and substrate choice have a direct impact on whether a QR code sticker scans consistently over time. Sharp edges, clean module definition, and strong contrast are essential, so production methods should be chosen with enough resolution and consistency to reproduce the code accurately. Poor printing can cause ink spread, broken modules, fuzzy edges, or uneven fill, all of which reduce readability. This is especially risky with small stickers, dense codes, or mass print runs where quality can drift between batches.
Material and finish also matter because stickers live in physical environments. A glossy laminate may look attractive but can introduce glare under retail or outdoor lighting, making scanning more difficult. Matte finishes are often safer for usability. Likewise, a sticker placed on a curved bottle, textured cardboard, flexible pouch, painted wall, or dirty industrial machine may distort or obscure parts of the code. Adhesive strength, weather resistance, UV durability, abrasion resistance, and chemical exposure should be considered when the sticker needs to last in kitchens, warehouses, healthcare settings, transit systems, or outdoor installations.
Another important consideration is placement surface color and pattern. If the sticker is clear or printed on a material that allows background show-through, the underlying surface can reduce contrast and compromise the quiet zone. For that reason, opaque white backing is often preferred unless the transparent effect has been thoroughly tested. In most cases, the best-performing QR code sticker uses a matte finish, durable material appropriate for the environment, and a print process that preserves crisp, undistorted modules from the first label to the last.
How should you track performance and measure the success of a QR code sticker campaign?
Measurement should be planned before the sticker is printed, not after deployment. The most effective approach is usually to use a dynamic QR code that points to a controlled destination URL, allowing marketers to update the landing page and capture scan analytics without reprinting the sticker. This makes it possible to monitor total scans, time trends, device patterns, and campaign-level performance. It also reduces risk because the destination can be changed if a page is moved, a promotion ends, or an error needs to be corrected.
To get useful data, each sticker deployment should be tied to a clear tracking structure. That may include campaign parameters, unique URLs by location, separate QR codes for different placements, or variant testing for calls to action and design treatments. For example, a restaurant chain might use one QR code sticker version for window placement, another for takeout packaging, and another for table tents to compare engagement by context. Without that level of planning, scan volume may be visible, but the reasons behind performance differences will remain unclear.
Success should also be measured beyond scans alone. A high scan count is not enough if users bounce immediately or fail to complete the intended action. The more meaningful metrics usually include landing page load speed, conversions, payment completions, form submissions, app installs, coupon redemptions, or assisted offline outcomes such as in-store visits. Good QR code sticker design connects the physical trigger to a frictionless digital experience, and campaign measurement should reflect that full journey. When design, placement, and analytics are aligned, QR stickers become measurable performance assets rather than decorative print elements.