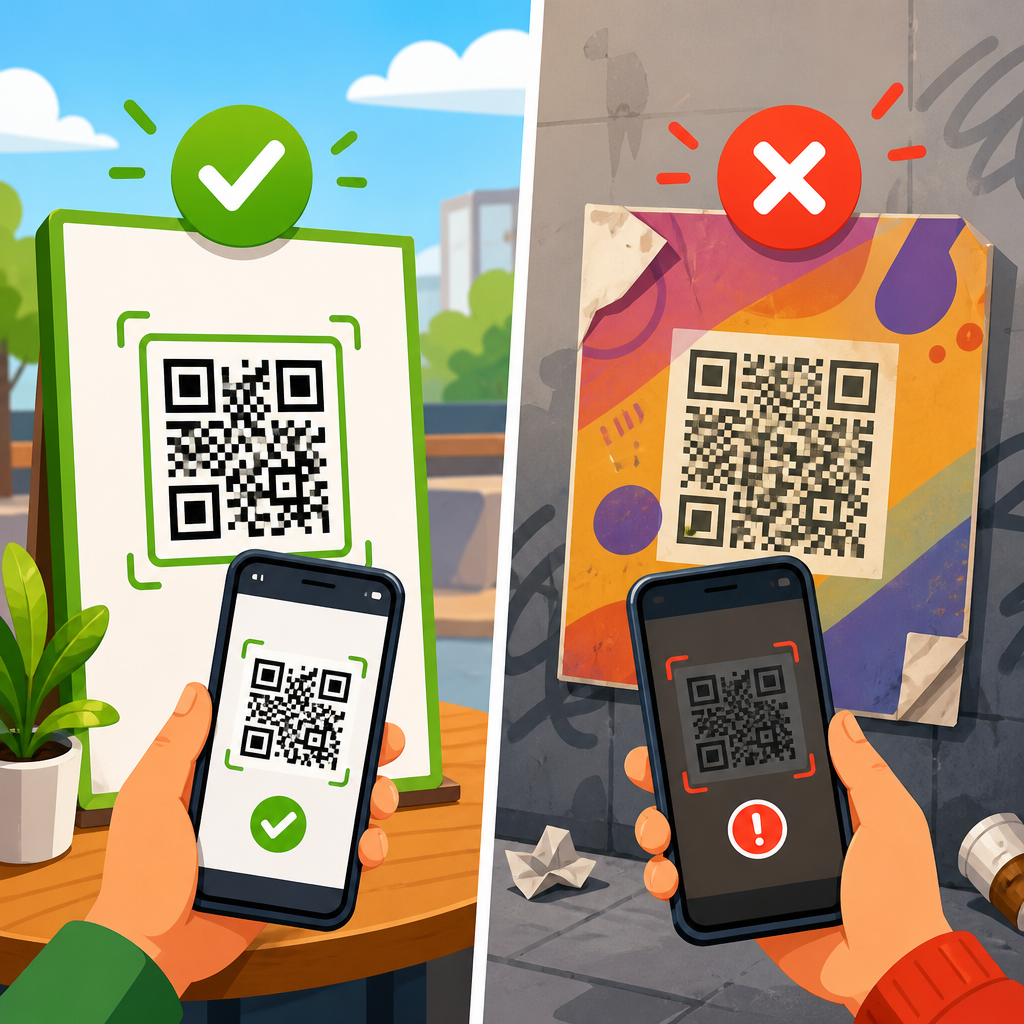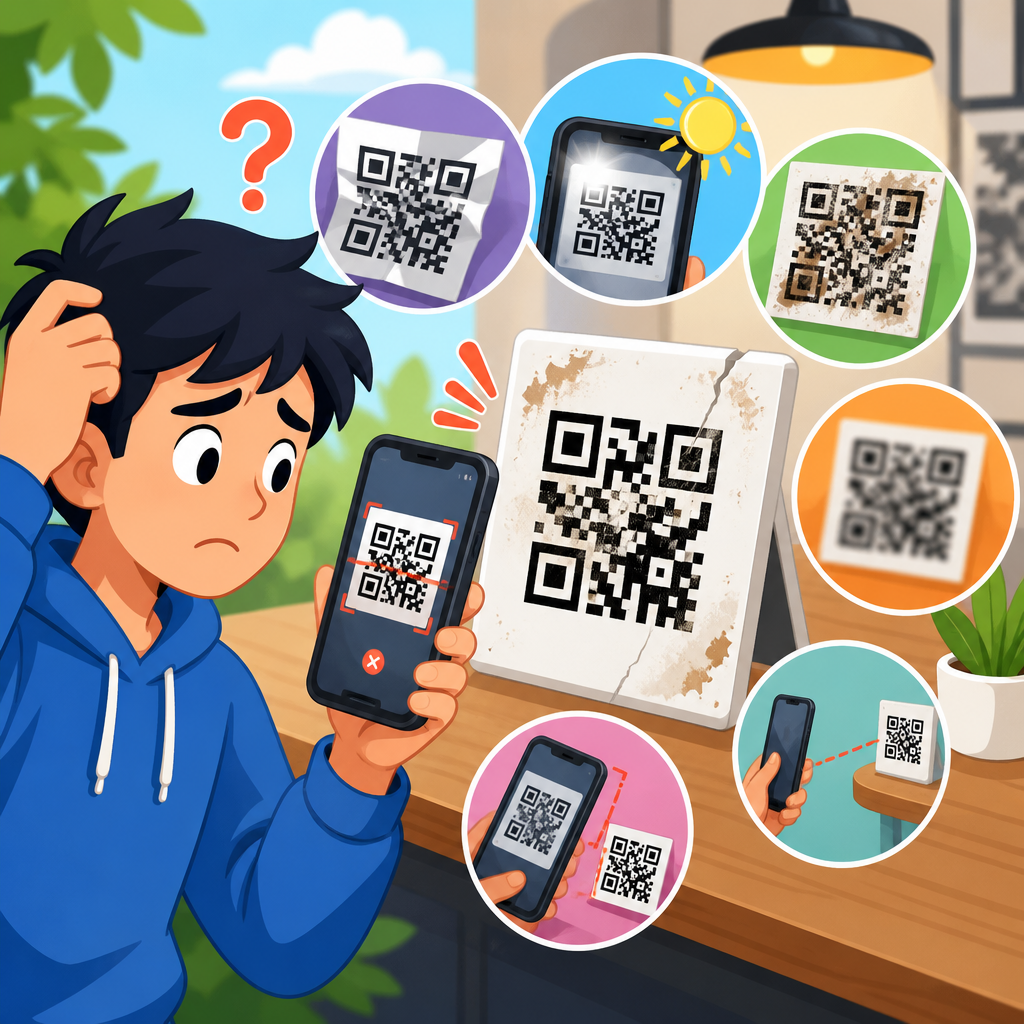
Glossy finishes look premium, but they are one of the most common reasons printed QR codes fail in the real world. In QR code troubleshooting, a glossy surface is any coated paper, laminated label, varnished card, acrylic sign, metal plate, or plastic package that reflects light strongly enough to interfere with camera capture. That interference matters because a QR code is not “read” like text; it is imaged by a camera, processed for contrast and geometry, then decoded using error correction. If glare obscures modules, softens edges, or introduces bright hotspots, scanning reliability drops fast. I have seen this repeatedly on menus, product packaging, retail shelf talkers, event badges, and window decals that looked excellent under studio lighting but failed under store LEDs or direct sun. As the hub page for printing mistakes within QR Code Troubleshooting & Support, this article explains why glossy surfaces create problems, how to diagnose them, and which printing choices prevent scan failures before a job goes to press.
Printing mistakes with QR codes are rarely about a single dramatic error. More often, they are small production decisions that compound: the wrong stock, insufficient quiet zone, low-contrast ink, overreduced size, or a varnish layer applied without considering how phone cameras behave. A QR code can still appear sharp to the human eye and remain difficult for image sensors to isolate. That is why this topic deserves its own sub-pillar. Teams often focus on artwork approval and ignore environmental scan conditions such as angled lighting, glass storefront reflections, or curved glossy bottles. Understanding the interaction between print finishing and machine vision helps marketers, designers, printers, and operations teams avoid costly reprints and customer friction. If your QR codes work inconsistently across phones, distances, or locations, glossy substrates should be among the first variables you investigate.
Why glossy surfaces interfere with QR code scanning
Glossy surfaces cause QR code issues because they change the light the camera receives. A phone camera needs clear separation between dark modules and light background areas. On matte stock, reflected light is diffuse, so the code remains legible from multiple angles. On glossy stock, reflected light is specular, meaning it bounces in a concentrated direction like a mirror. When that reflected path aligns with the camera, bright glare washes out parts of the symbol. The scanner then loses module boundaries, timing patterns, or finder patterns, and decoding fails or slows down.
The problem is amplified by how smartphone cameras process images. Automatic exposure compensates for bright highlights, often darkening the rest of the frame. Autofocus may lock onto a reflection instead of the printed surface. Noise reduction and sharpening can further distort tiny modules in low light. On heavily coated paper or laminate, these effects can make a perfectly generated QR code behave like a damaged one. In practice, users blame the code, not the finish, because the failure feels random: one angle works, another does not. That inconsistency is the signature of glare-related scan problems.
Gloss also magnifies other printing mistakes. If a code is already small, any reflected hotspot can cover a meaningful percentage of the data area. If contrast is marginal, glare pushes it below the threshold needed for binarization. If the print sits behind glass, the scanner must contend with both the finish reflection and the glass reflection. This is why glossy surfaces are not just an isolated production note; they act as a risk multiplier for the entire print setup.
Common glossy materials that create scan failures
Some materials are far more likely to produce QR code scanning issues than others. UV-coated postcards, high-gloss brochure covers, laminated menus, PET labels, metallized packaging films, acrylic countertop signs, polished metal plaques, and window decals are frequent offenders. In food service, laminated table tents often scan poorly under overhead spotlights. In retail, product labels on curved glossy bottles force the camera to capture both glare and distortion. In events, badges with plastic sleeves create an extra reflective layer that can turn a scannable code into a frustrating one.
Surface curvature is an overlooked factor. A glossy flat card may scan acceptably from a slight tilt, but a glossy cylindrical bottle creates reflections across changing angles, while also warping the square grid. That combination stresses the decoder. Similarly, brushed metal or foil-stamped packaging can create uneven reflectance across the code area. Even when black-on-white contrast appears strong to the eye, the camera may see low contrast once bright reflections clip highlights. I have tested shelf labels that worked under office light but failed under supermarket LEDs because the light source was directional and intense.
Location matters as much as material. A glossy QR code in a controlled indoor setting may scan reliably, while the same code placed in a shop window, on a car windshield sticker, or near a bright point-of-sale display becomes unreliable. Before approving production, assess where the code will live, what lights it will face, and whether people will scan from head-on or from the side.
Printing mistakes that make glossy QR code problems worse
Several print errors commonly combine with gloss to reduce scan performance. The first is insufficient contrast. Best practice remains dark modules on a light, nonreflective background. Reversed codes, metallic inks, pastel backgrounds, and transparent substrates all lower decoding margins. The second is undersized output. A small QR code on a glossy card leaves no room for optical imperfections. As a practical baseline, many production teams use at least 2 x 2 centimeters for close-range scanning, then enlarge based on distance, camera quality, and placement.
The third issue is poor quiet zone management. Every QR code needs a blank margin around the symbol, typically four modules wide at minimum according to ISO/IEC 18004 guidance. Designers often let backgrounds, borders, or adjacent text crowd the edges. On glossy prints, reflections around the perimeter can already confuse edge detection; if the quiet zone is reduced, the scanner has even less structure to work with. The fourth problem is low effective resolution. Vector export is ideal, but I still see raster codes enlarged in layout tools, introducing softness. On reflective stock, softened edges become harder for the camera to threshold correctly.
Another frequent mistake is post-press finishing without functional testing. A code may scan before lamination, then fail after spot UV or film application. Printers and marketing teams sometimes test the prepress PDF and assume the finished piece will behave the same. It will not. You need to test the final produced object, under the same lighting and handling conditions users will encounter. That includes angle, distance, and multiple phone models.
How to diagnose whether gloss is the real problem
You can identify gloss-related QR code issues with a simple field test. First, scan the code under diffuse light, such as near a window without direct sun. Then scan it under direct overhead light. Next, tilt the item slightly and try again. If the code works at one angle but not another, glare is likely involved. If covering surrounding reflections with your hand improves scanning, that is another strong indicator. Compare results against the same file printed on matte paper. If the matte version scans consistently while the glossy one does not, the substrate is the issue.
Use more than one scanning app and more than one phone. Native iPhone and Android camera apps are usually reliable, but models differ in autofocus, HDR behavior, and image processing. Testing with older devices is valuable because they have less computational photography support. In production reviews, I also inspect the code through the phone screen before attempting to scan. If finder patterns flare white, if the black modules appear gray, or if a hotspot moves across the code as the item tilts, the camera is telling you exactly why decoding struggles.
| Symptom | Likely glossy-surface cause | Practical fix |
|---|---|---|
| Scans only when tilted | Specular glare blocks part of the symbol | Switch to matte laminate or reposition lighting |
| Works indoors, fails outdoors | Direct sunlight creates high-intensity reflection | Increase size, use matte stock, change placement |
| Sharp to the eye, unreadable to phones | Camera exposure and contrast collapse under gloss | Boost contrast and remove reflective coating over code |
| Scans on some phones only | Different autofocus and HDR handling | Test broadly and raise print tolerance margins |
How to fix glossy QR code printing without sacrificing design
The most effective fix is simple: keep the QR code area matte, even if the rest of the piece stays glossy. On packaging and premium print, this can be done with a knockout in the varnish, a matte patch over the code, or a separate matte label. This preserves brand presentation while protecting scan reliability. If full matte is not possible, increase the code size beyond the minimum, maintain strong black-on-white contrast, and leave a generous quiet zone. Extra tolerance gives the scanner more information when reflections occur.
Placement is equally important. Avoid putting QR codes near folds, seams, bottle shoulders, windows, or curves with intense reflections. On signage, place the code where users can approach from different angles rather than only head-on under downlights. If the code must go behind glass, use anti-glare material where feasible and test at the actual installation height. For menus and tabletop materials, soft-touch matte laminates often retain a premium feel without the mirror effect of gloss film.
Designers should also avoid decorative modifications that reduce decoder resilience. Rounded modules, embedded logos, gradients, and colored backgrounds can work, but only if the base print conditions are forgiving. On glossy surfaces, conservative design wins. Use a static or dynamic QR code generated from a trusted platform, export it as vector, verify the error correction level is appropriate, and proof the final output physically. A dynamic code helps later content changes, but it does not solve print physics. The print has to be scannable first.
Prepress, press, and post-press controls that prevent reprints
Reliable QR code printing starts in prepress. Generate the code from a stable URL, then keep it as vector artwork in PDF, EPS, or SVG format. Do not screenshot a code from a browser and scale it in layout software. Confirm sufficient module size at final trim dimensions, and check the quiet zone after all bleed, crop, and design elements are placed. If the code will be printed by flexography, thermal transfer, or inkjet on packaging, account for dot gain, ink spread, and substrate movement, because these can close small white spaces between modules.
On press, color management matters less than contrast management. A dense black printed cleanly on a bright, nonreflective background is preferable to stylized color combinations that weaken signal separation. Ask for drawdowns or wet proofs on the actual stock, not just digital comps. If coatings are planned, specify whether the QR area is exempt. Post-press, perform acceptance testing on random samples from the run, not just one perfect copy. Scan under warehouse light, retail light, daylight, and low light. This is standard quality control, not overcaution. A single failed campaign tied to bad QR readability can cost more than the extra proofing step many times over.
For teams building a complete QR code troubleshooting process, this printing mistakes hub should connect to deeper guidance on QR code size, quiet zone errors, low contrast printing, curved surfaces, lamination problems, ink bleed, and testing protocols. Use this page as the starting point when scans fail on printed materials that otherwise appear professionally produced.
Glossy surfaces cause QR code issues because cameras need clean contrast and stable geometry, while reflective finishes introduce glare, exposure shifts, and lost detail. In real production, gloss rarely acts alone. It combines with small code sizes, reduced quiet zones, weak contrast, curvature, glass, and decorative treatments to produce scan failures that seem inconsistent but are technically predictable. Once you understand that pattern, troubleshooting becomes faster. You stop blaming the generator and start examining the substrate, finish, placement, and light.
The most reliable solution is to treat scanability as a print specification, not a final cosmetic check. Keep the QR code area matte whenever possible, print with strong contrast, protect the quiet zone, use vector artwork, and test the finished item in the environment where customers will actually scan it. Those practices prevent reprints, reduce support tickets, and remove friction from campaigns, packaging, menus, signage, and product labels. If you manage printed QR codes at any scale, review your current materials, identify glossy applications first, and build a repeatable approval checklist for every future run.
Frequently Asked Questions
Why do glossy surfaces make QR codes harder to scan?
Glossy surfaces create strong reflections that interfere with how a phone camera captures the QR code image. A QR code is not interpreted the way a person reads printed text. Instead, the camera has to photograph the symbol, detect the contrast between dark and light modules, identify its boundaries, correct any perspective distortion, and then decode the data. When a glossy finish reflects overhead lights, sunlight, flash, or bright surroundings, parts of the code can become washed out or obscured by glare. That glare reduces visible contrast and can hide key positioning patterns or timing patterns the scanner depends on.
This is why a QR code may look perfectly sharp to the human eye and still fail repeatedly on real devices. Human vision can often compensate for shine and mentally fill in missing details, but scanning software needs a much cleaner image. Even a brief reflected hotspot across a small section of the code can make the camera see a bright patch where dark modules should be. In practical terms, glossy coatings on labels, cards, packaging, acrylic displays, metal plates, and laminated prints are among the most common physical causes of inconsistent QR code performance.
What kinds of glossy materials are most likely to cause QR code issues?
Any material that produces noticeable specular reflection can create scanning problems, but some surfaces are especially risky. Coated paper stocks, UV varnishes, lamination films, plastic packaging, acrylic signage, polished metal, and high-gloss labels are frequent trouble spots. These materials tend to reflect light in a concentrated way rather than diffusing it, which means a camera can capture bright glare streaks or hotspots directly over the code. If the QR code is small, densely encoded, or printed with thin quiet zones, even minor glare can be enough to prevent reliable decoding.
Curved glossy surfaces can be even more problematic because they combine reflection with distortion. For example, a QR code printed on a shiny bottle, canister, or wrapped package may reflect light unevenly across the surface while also bending the code geometry. The scanner then has to solve two problems at once: low contrast from glare and altered shape from curvature. Glossy metallic labels are another common issue because they can reduce edge clarity and create mirror-like reflections that overwhelm the code pattern. In general, if a surface looks premium and shiny under bright lighting, it should be treated as a high-risk substrate for QR code scanning.
If a QR code uses error correction, why doesn’t that solve glossy surface problems?
Error correction helps, but it is not a cure for poor image capture. QR codes include built-in error correction so the decoder can recover data when part of the symbol is damaged, dirty, or partially blocked. However, error correction only works after the scanner has successfully detected and interpreted enough of the code structure to begin decoding. If glare prevents the camera from clearly seeing the finder patterns, alignment features, module grid, or contrast boundaries, the decoding process may fail before error correction can even do its job.
There is also a practical limit to how much data can be recovered. A reflective hotspot may wipe out a concentrated area of modules rather than creating light, random damage. If that glare covers critical structural areas or creates enough contrast loss across multiple sections, the scanner may not be able to map the symbol correctly. In other words, error correction is helpful for resilience, but it is not a substitute for good print production and suitable materials. It is best viewed as backup protection, not as a reason to ignore gloss-related risks.
How can I tell whether gloss is the reason a printed QR code is failing?
A strong clue is inconsistent performance that changes with lighting angle, viewing angle, or device position. If the code scans in one part of a room but not another, works when tilted, or succeeds only when the phone is moved around to avoid a bright reflection, gloss is very likely involved. Another common sign is a visible glare patch across the code when viewed under direct light. You may also notice that the code performs better in softer ambient lighting than under spotlights, daylight through windows, or retail ceiling fixtures. These patterns point to reflection problems rather than data, design, or destination URL issues.
A simple diagnostic approach is to test the same printed code in multiple environments and from different angles. Try scanning under diffuse lighting, then under bright directional lighting. Tilt the printed piece slightly and watch whether reflections move across the code. If scanning improves as glare shifts away, the finish is a major factor. It is also useful to compare the glossy version to a matte proof printed at the same size and with the same artwork. If the matte version scans reliably while the glossy one does not, that is strong confirmation that surface reflectivity is the root cause.
What are the best ways to prevent QR code problems on glossy surfaces?
The most reliable solution is to avoid high-gloss finishes directly over the QR code area. If the overall design needs a premium appearance, many brands use spot treatments that keep the code itself on an uncoated or matte patch while preserving gloss elsewhere. Matte laminates, low-sheen varnishes, and non-reflective label materials are usually much safer choices. Increasing the printed size of the QR code can also help because larger modules are easier for cameras to distinguish even when some reflection is present. Maintaining a clear quiet zone, using strong dark-on-light contrast, and not crowding the code with decorative elements are equally important.
Placement and testing matter just as much as material choice. Avoid putting QR codes where they will be hit by direct overhead lighting or where users are likely to scan at awkward angles, such as behind glass, on curved shiny containers, or on polished metal signage. Before final production, test actual samples in realistic conditions using several phone models and both iOS and Android devices. Scan in daylight, retail lighting, office lighting, and any environment where customers will use the code. A QR code that passes only in controlled studio conditions is not production-ready. In most cases, combining a matte or low-glare surface with proper sizing and real-world testing is the most effective way to prevent glossy-surface scanning failures.