QR code error handling determines whether a symbol still scans after it has been scratched, resized, printed on uneven material, or partially covered by branding, and in real projects that reliability is often the difference between a seamless customer interaction and a failed campaign. In the context of QR code technology and development, error handling usually refers to the combination of encoding choices, symbol design, print quality control, scanner behavior, and, most importantly, error correction levels. Error correction levels are the built-in recovery settings that let a QR code remain readable even when part of the data area is damaged or obscured. The four standard levels are L, M, Q, and H, and they roughly allow recovery from about 7 percent, 15 percent, 25 percent, and 30 percent of symbol damage respectively. Those percentages are widely cited, but they should be treated as practical guides rather than absolute guarantees because the location, pattern, and type of damage matter as much as the amount.
This topic matters because QR codes no longer live only on clean packaging or pristine brochures. I have worked on QR implementations for retail shelf tags, restaurant menus, event badges, industrial labels, direct mail, and outdoor signage, and the failure patterns are remarkably consistent: low contrast, poor quiet zones, reflective lamination, overcompressed artwork, and the wrong error correction level for the environment. Teams often assume a QR code either works or does not, yet successful deployment depends on engineering choices made long before the first customer scans. Understanding error correction levels is therefore foundational for developers, designers, marketers, and operations teams. As the hub for this subtopic, this article explains how QR code error handling works, when to choose each correction level, how real-world damage affects scannability, and what design and testing practices prevent avoidable failures across print and digital use cases.
How QR Code Error Correction Levels Work
QR codes use Reed-Solomon error correction, a mathematical method that adds redundant codewords so missing or corrupted data can be reconstructed during decoding. In plain terms, the symbol stores both payload data and repair information. When a scanner captures the image, the decoder analyzes the finder patterns, alignment patterns, timing patterns, and format information, then attempts to recover the original message even if some modules are unreadable. This is why a QR code with a torn corner can still open a URL. The correction level you choose determines how much redundancy is added. More redundancy increases resilience, but it also reduces data capacity or forces the symbol to become denser and physically larger for the same payload.
That tradeoff affects every implementation decision. If you encode a short dynamic URL, you can usually afford high correction because the payload is small. If you encode a long vCard, Wi-Fi credential, or payment string, moving from M to H may push the code into a higher version with more modules, making it harder to scan at small print sizes. Developers sometimes overlook that error correction is not free insurance; it changes symbol geometry. In one packaging project, switching from M to H fixed damage tolerance but created a new problem because the compressed label area forced the code below the minimum effective module size. The better solution was shortening the encoded URL, keeping H, and slightly enlarging the print area. Error handling starts with payload discipline as much as with mathematical recovery.
Choosing the Right Level for Real-World Use Cases
The best error correction level depends on environment, scan distance, expected wear, and whether the symbol will be stylized. Level L works well for clean, controlled conditions such as on-screen login flows, internal documents, or high-resolution labels scanned soon after production. Level M is a common general-purpose default because it balances resilience and density for brochures, business cards, and standard product packaging. Level Q is useful when moderate wear or partial obstruction is likely, including restaurant table tents, warehouse labels, and consumer packaging with curved surfaces. Level H is usually the safest choice for branded QR codes with logos, outdoor posters, event passes, and any asset expected to face abrasion, folds, glare, or repeated handling.
The percentages alone should not drive the decision. A code can survive more than 25 percent damage in scattered spots yet fail with far less if the damaged modules cluster in critical regions or if the quiet zone is compromised. For example, a coffee cup sleeve may expose the code to wrinkles and hand oils. A direct-mail postcard may be bent, while an event wristband may stretch and distort. In these cases, Q or H gives useful recovery headroom, but only if print contrast remains strong and the symbol is not crowded by surrounding artwork. When I evaluate a deployment, I rank risk across five factors: data length, physical size, surface quality, expected damage, and camera conditions. That simple framework usually leads to the right level faster than relying on generic rules.
| Error correction level | Approximate recovery capacity | Best fit scenarios | Main tradeoff |
|---|---|---|---|
| L | About 7% | On-screen codes, short-term internal labels, clean inserts | Lowest resilience to damage or styling |
| M | About 15% | General marketing print, packaging, business cards | Moderate recovery with moderate capacity cost |
| Q | About 25% | Frequently handled items, curved packaging, table displays | Higher density or larger symbol needed |
| H | About 30% | Logo overlays, outdoor signage, harsh environments, tickets | Largest capacity penalty and densest code for same payload |
Damage Patterns That Break Scans in Practice
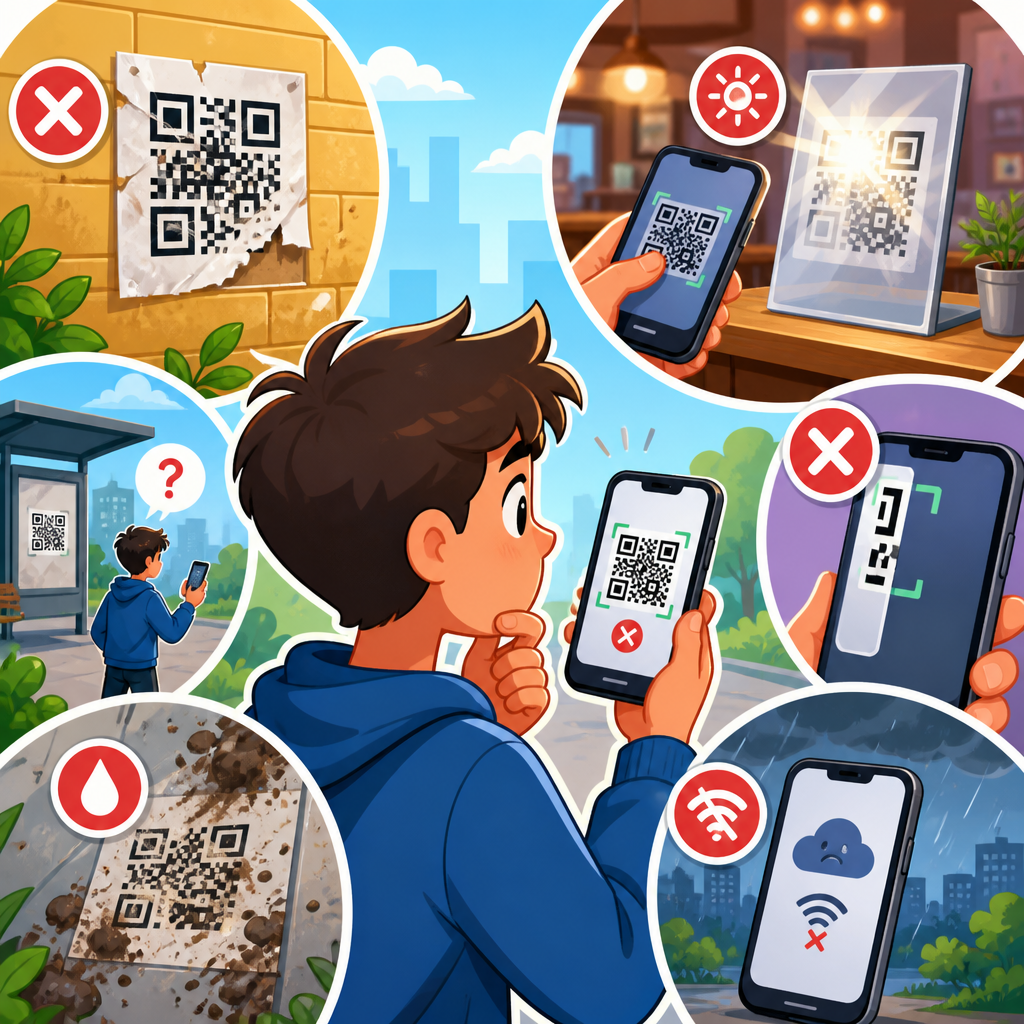
Real-world QR code failure rarely comes from a single dramatic tear. It usually comes from several smaller defects that combine into one unreadable symbol. Common examples include ink spread on porous stock, thermal transfer ribbon inconsistency, UV fading on window displays, lamination glare, low-contrast color choices, and aggressive image compression in social media exports. Smudges and scratches do matter, but they are only one class of failure. Perspective distortion can be just as harmful. A code wrapped around a bottle narrows modules near the edges, while a code placed on corrugated cardboard can lose clean module boundaries altogether. Error correction helps with missing information, not with every optical problem, which is why resilient deployment requires both robust encoding and disciplined production standards.
One misunderstanding I repeatedly correct is the belief that a higher level can compensate for weak design. It cannot rescue a code whose quiet zone is invaded by text, whose foreground and background have insufficient luminance contrast, or whose module size is too small for the intended scan distance. Smartphone cameras and decoder libraries have improved substantially, but they still depend on recognizable structure. ISO/IEC 18004 defines the symbol specification, and print quality verification often references ISO/IEC 15415 for two-dimensional codes. In practical terms, you should think of error correction as a safety margin after core requirements are met. If the code is badly lit, physically distorted, and partially obscured, even H may not save it. Reliability comes from stacking good decisions, not from one setting.
Branded and Designed QR Codes: Where Error Handling Gets Tested
Branded QR codes are where error correction levels become especially important because marketers often ask the symbol to carry visual identity in addition to data. Adding a center logo, changing module shapes, applying gradients, or embedding the code into illustrated packaging all consume the tolerance budget that error correction provides. In most branded implementations, I start at H, use a short redirect URL, preserve strong contrast, and keep the logo clear of finder patterns, alignment patterns, and timing lines. The logo should cover only a modest central area, and the final asset must be tested on multiple devices under varied lighting. A code that scans in a design file preview can still fail after matte varnish, shrink-wrap distortion, or a slightly darkened brand color is introduced in production.
There is also a strategic reason to prefer dynamic URLs for branded QR codes. If scan rates reveal decoding friction in the field, the destination can be updated without reprinting, and analytics can isolate which placements underperform. I have seen campaigns blame landing pages for low engagement when the actual issue was scan friction caused by stylized symbols on reflective surfaces. Error handling is therefore not only a technical quality issue but also a measurement issue. Better correction levels, simpler payloads, and careful visual customization protect data integrity at the moment of capture. If this article is your hub for error correction levels, the linked subtopics should include logo-safe design limits, quiet zone management, color contrast testing, and QR code print verification because each one directly affects how much useful protection those levels can actually deliver.
Testing, Validation, and Operational Safeguards
Choosing an error correction level is only the beginning; validation determines whether the choice survives real conditions. Effective testing includes device diversity, distance variation, lighting variation, and damaged-sample trials. I typically test current iPhone and Android devices, at least one lower-end camera, and more than one scanning app because decoder behavior differs. Native camera apps, Google Lens, Zebra enterprise scanners, and industrial imagers do not all tolerate the same distortions. For print, samples should be checked after finishing processes such as lamination, varnish, embossing, or die cutting. For digital displays, brightness, moiré, refresh behavior, and screenshot sharing all matter. A QR code that scans perfectly from a desktop monitor may fail on an LED display at an event due to pixel structure and viewing angle.
Operational safeguards reduce risk after launch. Maintain source files in vector format, lock approved symbol sizes, document the chosen correction level, and require production proofs before mass printing. If teams regenerate codes ad hoc with different software, they may unintentionally change version, mask pattern, margin, or correction settings. I recommend creating a simple implementation standard: approved generators, minimum module size, minimum quiet zone of four modules, contrast requirements, and required test scenarios. For high-volume operations, formal verification with dedicated tools such as Axicon or Cognex grading equipment is worth the cost. These systems measure parameters such as symbol contrast, modulation, fixed pattern damage, and decode performance. They do not replace field testing, but they catch quality drift early, especially in manufacturing and logistics environments.
Common Mistakes and Better Decision Rules
The most common mistake is selecting a correction level in isolation. Teams choose H because they want “maximum safety,” then discover the code became too dense for a small label. Others choose L to keep the symbol compact, then place it on packaging that will be scuffed in transit. Better decisions come from sequencing the work correctly. First, minimize payload length. Second, determine physical size based on expected scan distance and print process. Third, assess environmental stress. Fourth, choose the lowest correction level that still provides appropriate resilience, increasing it when branding, handling, or surface risk justifies the cost. This approach produces cleaner symbols and more predictable performance than defaulting to one level across every use case.
Another mistake is assuming a successful office scan equals production readiness. Real users scan while walking, under mixed lighting, through fingerprints on phone lenses, with older devices, from awkward angles. Build for that reality. As a rule, use M for standard clean applications, move to Q for handled or mildly hostile environments, and use H when design treatments or physical abuse are likely. Reserve L for tightly controlled scenarios with short payloads and excellent presentation conditions. If reliability is business critical, reduce the amount of encoded data by using a short dynamic URL, enlarge the symbol, and keep visual styling conservative. Those three actions improve outcomes more consistently than any single software setting.
QR code error handling is ultimately about designing for the messy conditions of the real world, not the perfect conditions of a mockup. Error correction levels give you a structured way to balance resilience, capacity, and size, with L, M, Q, and H each serving a clear purpose. The right choice depends on payload length, symbol dimensions, surface quality, expected damage, and any branding treatment applied to the code. Reed-Solomon recovery is powerful, but it performs best when supported by strong contrast, proper quiet zones, adequate module size, and disciplined testing across devices and environments.
For teams building a dependable QR code program, the practical takeaway is simple: treat error correction levels as part of a system, not as a standalone feature. Start with a short payload, choose the level that matches the environment, verify production quality, and test with real devices in realistic conditions. That approach reduces scan failures, protects campaign performance, and makes every downstream QR code technology and development decision easier. Use this hub as the starting point for deeper work on symbol sizing, branded code design, print verification, and scanner compatibility, then apply those lessons before your next code goes live.
Frequently Asked Questions
What does QR code error handling actually mean in real-world scenarios?
In practical terms, QR code error handling is the set of decisions and safeguards that help a QR code remain scannable even when conditions are less than perfect. That includes built-in error correction, but it also extends to how the code is encoded, how much data it carries, how it is printed, where it is placed, what material it is printed on, and how scanners interpret it in the field. A QR code rarely fails for just one reason. More often, scanning problems happen because several small issues stack together, such as low contrast, slight distortion, glare, over-compression of data, or a logo covering too much of the symbol.
The most important technical component is error correction, which allows a scanner to reconstruct missing or damaged parts of the QR code. QR codes support multiple correction levels, commonly known as L, M, Q, and H, with higher levels allowing more damage tolerance at the cost of increased symbol density. In a lab, that may sound straightforward. In deployment, however, choosing the right level depends on how the code will be used. A code on a glossy product label, outdoor poster, curved bottle, or warehouse tag may need a different tolerance strategy than one shown on a bright mobile screen.
Real-world error handling also includes anticipating environmental and behavioral factors. People scan while walking, in poor light, with older phones, from awkward angles, and on worn surfaces. Effective handling means designing for those realities rather than assuming ideal conditions. In other words, QR code error handling is not just about whether the symbol can survive damage on paper; it is about building a scanning experience that stays reliable through printing flaws, physical wear, branding overlays, resizing, and the wide variation in scanner hardware and software.
How much damage can a QR code take before it stops scanning?
The answer depends on the QR code’s error correction level, overall design, and where the damage occurs. In general, QR codes can tolerate a surprising amount of disruption because they are designed with redundancy. Higher error correction levels allow a symbol to recover more missing or corrupted data, which is why codes can often still scan when scratched, smudged, or partially obscured. However, that does not mean all damage is equal. A small scratch through a non-critical area may have no visible effect on scanning, while damage near key structural patterns can cause immediate failure.
Location matters as much as amount. QR codes rely on fixed finder patterns, alignment patterns, timing patterns, and quiet zones to help scanners detect and interpret the symbol. If a branding element, tear, stain, or fold disrupts these critical features, scanning reliability can drop sharply even if the total damaged area seems small. By contrast, moderate disruption in less critical data regions may be recoverable if the error correction level is sufficient. That is why experienced developers and print teams do not evaluate resilience by percentage alone; they test likely damage patterns based on actual use conditions.
Data density also plays a major role. A QR code packed with too much information becomes visually denser, which reduces tolerance in practical scanning environments. Even with strong error correction, a very dense code printed at a small size may fail sooner than a simpler code with less embedded data. For that reason, many production teams reduce payload length by using short URLs or dynamic QR codes rather than encoding long strings directly. The result is a cleaner symbol with more margin for physical wear, imperfect printing, and real-world scanning variability.
How do logos, branding, and custom styling affect QR code error correction?
Branding can work well with QR codes, but it must be applied with discipline. Many teams assume that if a QR code has high error correction, they can safely place a large logo in the center or heavily stylize modules without consequence. In reality, branding consumes some of the same tolerance budget that error correction is meant to reserve for unpredictable damage. If too much of that budget is used on deliberate design changes, the code becomes less resilient to printing issues, scratches, glare, camera blur, or poor lighting.
The safest approach is to treat customization as a controlled modification rather than a purely visual exercise. A central logo should be modest in size, avoid interfering with finder patterns and quiet zones, and be tested across multiple devices and scanning apps. Color changes should preserve strong contrast between foreground and background. Decorative shapes can be acceptable if the code remains easy for scanners to interpret, but extreme stylization often reduces reliability, especially on low-resolution prints or when viewed at an angle. Gradient-heavy designs, low-contrast palettes, and transparent overlays may look polished on screen yet perform badly in production.
Higher error correction levels, especially Q or H, are commonly used when branding overlays are required, but that is not a guarantee of success. Good practice combines suitable correction levels with conservative logo sizing, clear quiet zones, adequate physical dimensions, and extensive testing under realistic conditions. It is also wise to validate the final branded asset after export and after printing, because some failures are introduced not by the design itself but by compression, rasterization, scaling, or substrate distortion. Strong branding and strong scan reliability can coexist, but only when error correction is treated as part of a broader design and quality-control process.
Why do QR codes sometimes fail after resizing or printing on difficult materials?
Resizing and material choice are two of the most common causes of field failures because both can distort the geometry that scanners depend on. When a QR code is resized improperly, individual modules can become too small, blurred, uneven, or misaligned. This is especially risky when raster images are scaled instead of using vector files. A code that looks acceptable to the eye may still become unreliable if module edges soften, if anti-aliasing introduces visual noise, or if the quiet zone is reduced during layout. Even small production changes can have a measurable impact on scan speed and success rate.
Printing on uneven, reflective, textured, or curved surfaces creates a different set of problems. Curvature can warp the symbol, making it harder for the scanner to interpret the module grid correctly. Glossy finishes can produce glare that obscures parts of the code. Textured packaging or fabric can break up edges and lower contrast. Low-quality printing can cause ink spread, dot gain, or incomplete module formation, all of which reduce readability. On very small labels, these issues become even more severe because there is less visual tolerance to begin with.
To reduce failures, teams should start with a symbol sized appropriately for its scanning distance and environment, use high-contrast artwork, preserve the quiet zone, and favor vector output whenever possible. Material-specific proofing is essential. A code that scans perfectly on a flat office printout may behave very differently on corrugated cardboard, shrink wrap, metalized packaging, or a curved plastic bottle. Real-world error handling means validating the code in its final production format, under realistic lighting and handling conditions, rather than assuming that digital approval equals physical reliability.
What are the best practices for improving QR code reliability in production and campaigns?
The strongest strategy is to think of QR reliability as a system, not a single setting. Start by minimizing the amount of encoded data so the symbol stays as simple and open as possible. Use short links or dynamic destinations when appropriate, because lower data density generally improves scan robustness. Then choose an error correction level based on real usage conditions. If the code may be exposed to wear, branding overlays, outdoor placement, or rough handling, a higher level may be justified. If the code will remain clean and unobstructed, a moderate level may provide a better balance between resilience and visual simplicity.
Next, focus on design and production controls. Maintain strong contrast, keep a proper quiet zone around the symbol, avoid over-stylization, and ensure the code is physically large enough for expected scanning distance. Use vector assets for print whenever possible, and confirm that layout software, printers, and export workflows do not alter proportions or clip margins. For difficult surfaces or premium packaging, request press proofs and test samples from the actual production run. Scanning should be verified on multiple devices, with different camera qualities and operating systems, and under the kinds of lighting and angles users will actually encounter.
Finally, treat testing and monitoring as ongoing parts of deployment. Before launch, test pristine codes as well as intentionally degraded versions to understand your safety margin. During a campaign, watch for user complaints, scan drop-offs, or location-specific performance issues that may point to print or placement problems. If dynamic QR codes are being used, analytics can help identify whether failures are related to scanning friction or destination issues. The most reliable QR implementations come from teams that plan for damage, distortion, and user variability from the beginning, rather than trying to fix scan failures after materials are already in circulation.