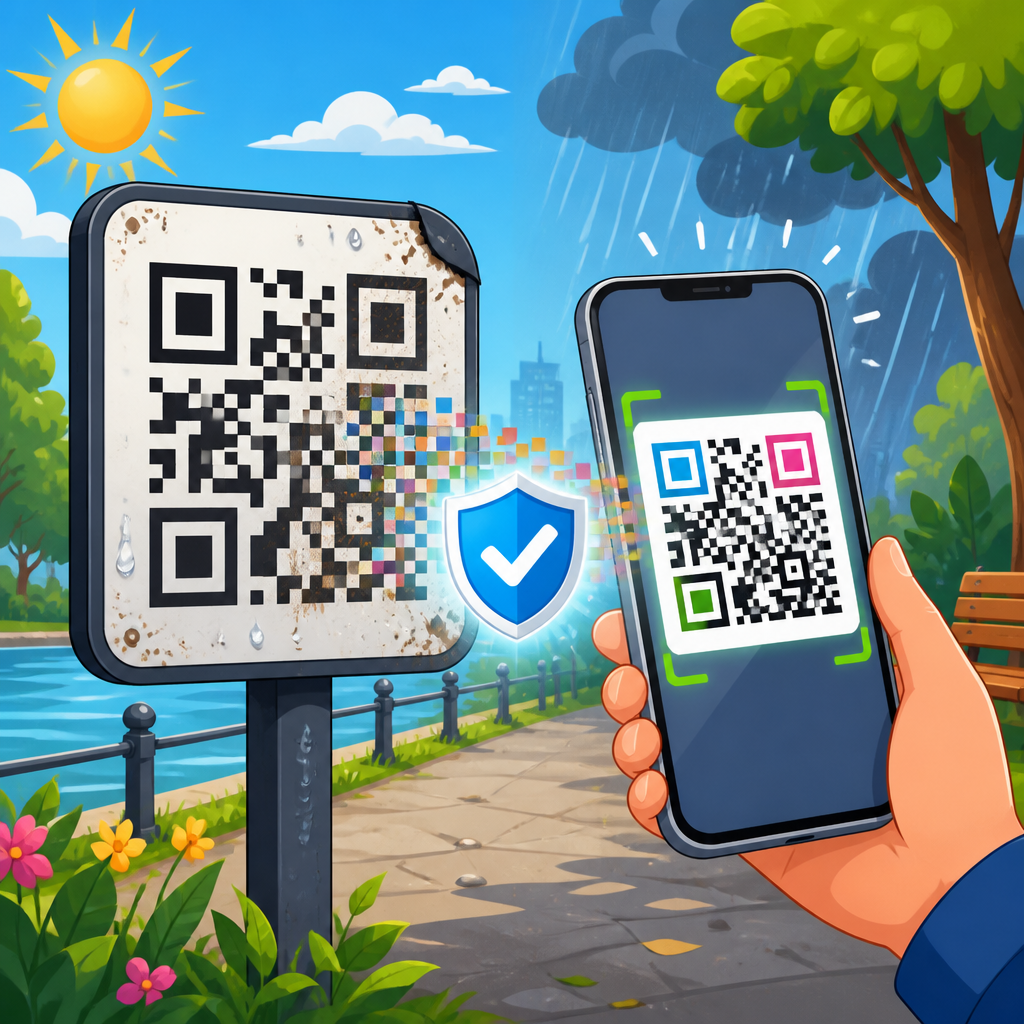
Outdoor QR codes fail for predictable reasons: sunlight fades ink, rain lifts labels, dust obscures modules, and viewers scan from awkward angles with imperfect cameras. Error correction for outdoor QR codes is the engineering discipline that keeps those symbols readable after real-world damage. In QR code design, error correction means adding redundant data so a scanner can reconstruct missing or corrupted areas. The core standard, ISO/IEC 18004, defines four levels: L, M, Q, and H. Those levels roughly restore 7, 15, 25, and 30 percent of symbol datawords respectively, though practical results depend on damage location, print quality, contrast, and masking. This matters because an outdoor code is not viewed in lab conditions. I have tested codes on parking signs, trail markers, retail windows, equipment labels, and event banners, and the pattern is consistent: teams focus on URL length and aesthetics, then discover too late that weathering, glare, and bad mounting create scan failures. A reliable outdoor deployment starts with understanding how error correction interacts with size, material, quiet zone, finder patterns, and expected abuse. This hub article explains the levels, when to use each, how to balance resilience against data density, and which field decisions most strongly affect scan success.
What QR code error correction levels actually do
QR code error correction is based on Reed-Solomon coding, a proven method used in storage, telecommunications, and barcodes. In simple terms, the encoder splits data into blocks, adds parity codewords, and lets the decoder recover information when some codewords are unreadable. The four selectable levels are not quality grades; they are redundancy settings. Level L uses the least redundancy and stores the most payload in the smallest symbol. Level H uses the most redundancy and tolerates the most damage, but it also increases the symbol version or reduces available capacity. For outdoor QR codes, this tradeoff is central. More redundancy can save a scan after scratching or fading, yet a denser symbol with smaller modules can become harder to resolve from a distance. That is why choosing the highest level by default is not always correct. If a maintenance label is scanned from six inches away, H may be ideal. If a billboard code must scan from across a sidewalk, M or Q paired with a larger printed code often performs better than an over-dense H symbol squeezed into the same space.
Another important point is what the percentages mean. Marketers often say a level can survive a certain percentage of damage anywhere on the code. That is an oversimplification. Reed-Solomon recovery depends on how corruption maps to codewords after interleaving. A logo covering the center, mud splashed across one corner, UV fading along one edge, or a torn laminate can produce very different outcomes even at the same visible damage percentage. Function patterns also matter. Finder patterns, alignment patterns, timing patterns, format information, and the quiet zone are structurally important. Error correction helps with damaged data modules, but if the quiet zone is compromised by a busy background or the finder patterns are distorted by glare, many scanners fail before decoding begins. In field audits, I have seen codes with theoretically sufficient error correction fail because a designer allowed the background image to creep into the quiet zone or because reflective laminate created bright hotspots over a finder pattern at midday.
How outdoor conditions change the error correction decision
Outdoor environments introduce distinct failure modes, and each one should influence the selected level. Weather exposure causes gradual contrast loss through ultraviolet fading, chalking inks, oxidation on metal, and grime accumulation. Mechanical wear comes from abrasion, vandalism, pressure washing, and repeated handling. Optical interference appears as glare on glossy coatings, uneven illumination at dawn or dusk, and motion blur when people scan while walking or driving slowly. Environmental context also matters: a code on a static museum placard has different needs than one on a moving rental scooter or a utility pole beside a road.
Because damage is expected outdoors, level M is best treated as the minimum baseline for serious installations. Level L may be acceptable for temporary event signage under supervision, but it provides too little margin for monthslong exposure. Level Q is a strong default when the code may face moderate wear, branding overlays, or light soiling. Level H is appropriate for harsh conditions, long replacement cycles, or labels likely to be partially covered by scratches, tape residue, or inspection stickers. Still, increasing the level is only one control. Durable substrate, UV-stable printing, matte overlaminate, generous quiet zone, and adequate physical size usually improve real-world scan rates more than redundancy alone. In one retail rollout, replacing glossy window decals with matte high-contrast vinyl solved more scan failures than moving from M to H, because glare, not missing data, was the main problem.
Choosing between L, M, Q, and H in practice
The right error correction level depends on scanning distance, expected lifespan, payload length, and branding requirements. Short URLs created through a dynamic QR platform give you freedom because they reduce encoded data and keep module size larger at any chosen level. Long static URLs, vCard payloads, Wi-Fi credentials, and multilingual text consume more capacity and often push the symbol into higher versions with denser patterns. Outdoors, that density penalty can outweigh the benefit of more redundancy. I generally start by shortening the payload first, then selecting the error correction level second, because simpler symbols are easier to scan under poor conditions.
| Level | Approximate recovery | Best outdoor use | Main tradeoff |
|---|---|---|---|
| L | 7% | Short-term posters in protected areas | Lowest resilience to fading and abrasion |
| M | 15% | General signage with low wear | May be insufficient for long exposure or overlays |
| Q | 25% | Outdoor signs with moderate weathering or small logos | Higher density if space is fixed |
| H | 30% | Asset labels, harsh environments, long replacement cycles | Greatest density and capacity penalty |
Use L when the code is temporary, large, protected, and easy to rescan from up close. Use M for standard exterior posters, menu boards under canopies, or windows that are cleaned regularly. Use Q for trailhead signs, outdoor product displays, and transit placements where dirt or scratches are plausible. Use H for industrial tags, parking equipment, construction fencing, and any placement where a portion of the symbol may be obstructed. If you plan to place a logo inside the code, choose Q or H and test the exact artwork, because logo shape, opacity, and placement affect decodability. The practical rule is simple: select the lowest level that still passes field testing with margin, then spend the remaining budget on larger print size and better materials.
Design variables that matter as much as error correction
Error correction cannot compensate for poor physical design. The first variable is module size, the tiny square that forms the grid. Outdoor codes need modules large enough for the expected scan distance and the camera quality of older phones. A common planning rule is to increase code size with distance rather than relying on digital zoom. For close-range labels, a 25 to 30 millimeter code may work; for signs scanned from several feet away, 40 to 75 millimeters or more is safer. The second variable is contrast. Black on white remains the benchmark because scanners detect luminance contrast more reliably than color contrast. Dark blue on white can work, but pale colors, metallic inks, and transparent backgrounds often fail outdoors.
The third variable is finish. Matte surfaces outperform gloss because they minimize specular reflection. Fourth is quiet zone preservation. The clear border around the code should be at least four modules on all sides, and more is better when the background is visually complex. Fifth is placement angle. Mounting a code where direct sun repeatedly reflects into a camera can make a theoretically robust symbol unreadable for hours each day. Sixth is print process. Thermal transfer, UV-cured ink, screen printing, laser marking, and engraved plates each age differently. On powder-coated metal labels, laser marking often maintains contrast longer than printed adhesive stock. In municipal wayfinding, laminated vinyl may last, but only if edge sealing prevents moisture intrusion and lifting. These are not minor details. In postmortems, scan failures are usually traced to a combination of density, glare, and poor contrast rather than to an inadequate error correction setting alone.
Testing outdoor QR codes before and after installation
Field testing should be treated as mandatory quality assurance, not a final checklist item. Start with preproduction tests using the exact payload, error correction level, artwork, material, and print method. Scan with multiple devices, including older midrange Android phones and at least one recent iPhone, because autofocus behavior and decoding software differ. Test at the intended distance, in direct sun, open shade, overcast conditions, and evening light. Introduce realistic abuse: light scratching, dusting, water droplets, fingerprints, and partial tape coverage. If a code only scans after careful framing with a flagship phone, it is not ready for outdoor deployment.
After installation, verify not just whether the code scans, but how quickly a first-time user succeeds. Time-to-scan is an operational metric that reveals friction before complete failure appears. A code that scans in one second when new but needs four or five seconds after two months may still be technically readable, yet it is already underperforming. Track analytics through dynamic redirects, but interpret them carefully. Lower scan volume can reflect visibility or traffic changes, not only decode problems. Pair analytics with physical inspections. In long-term programs, I recommend documenting condition with periodic photos and a replacement threshold based on visible fading, peeling, or scan delay. This transforms maintenance from guesswork into a service standard.
Common mistakes and the best hub topics to explore next
The most common mistake is assuming level H solves everything. It does not. If raising the level forces a smaller module size inside a fixed print area, performance may worsen. Another frequent error is embedding long static content when a short dynamic URL would create a much cleaner symbol. Teams also underestimate the risk of decorative customization. Rounded modules, low-contrast palettes, transparent backgrounds, inverse color schemes, and oversized logos all consume the safety margin that error correction is supposed to preserve. For regulated or safety-critical contexts, avoid novelty styling and prioritize standards-compliant contrast and geometry.
As a hub for error correction levels, this topic naturally connects to several deeper subjects. One is QR code sizing for scan distance, because module size often matters more than theoretical recovery percentage. Another is print materials for outdoor QR codes, covering UV resistance, abrasion resistance, and adhesive performance. A third is quiet zone and placement strategy, especially on cluttered signs and reflective surfaces. A fourth is dynamic versus static QR code architecture, since payload length drives version size and influences which correction level is practical. Finally, logo insertion deserves its own treatment because the acceptable overlay area depends on level, version, and testing method. When these topics are handled together, outdoor QR performance becomes predictable instead of trial and error.
Error correction for outdoor QR codes is best understood as one part of a durability system, not a standalone switch. The four levels L, M, Q, and H control how much damaged data a decoder can recover, but outdoor scan success also depends on module size, contrast, quiet zone, material choice, surface finish, placement, and payload length. In most real deployments, M is the floor, Q is a dependable default, and H is reserved for harsh conditions, overlays, or long service intervals. The smartest path is to shorten the payload, print the code as large as the space allows, preserve a clean quiet zone, and test under the same sun, glare, moisture, and wear the code will actually face. That approach consistently outperforms aesthetic guesswork or relying on the highest setting without validation.
If you manage signage, packaging, facilities, or field assets, audit your current outdoor QR codes with these criteria and document where failures originate. Then refine level selection, materials, and sizing together. A code that scans quickly in real weather is not an accident; it is the result of deliberate error correction strategy backed by field testing.
Frequently Asked Questions
What does error correction mean for outdoor QR codes?
Error correction is the built-in recovery system that helps a QR code remain scannable even after part of it has been damaged, obscured, or degraded. In practical terms, a QR code does not only store the visible data you want people to access; it also includes redundant information that allows a scanner to rebuild missing or corrupted portions of the symbol. For outdoor use, that redundancy is critical because the code is exposed to conditions that regularly damage printed graphics. Sunlight can fade dark modules, rain and humidity can cause labels to lift or wrinkle, dust and mud can cover sections of the code, and users often scan from awkward angles with average smartphone cameras rather than ideal equipment.
The QR standard, ISO/IEC 18004, defines four error correction levels: L, M, Q, and H. As the level increases, the code can tolerate more damage, but it also becomes denser and more complex. That tradeoff matters outdoors because a code that survives abrasion, weathering, and partial obstruction is usually more valuable than one optimized only for compact size. In short, error correction is the engineering mechanism that gives outdoor QR codes resilience in the real world, where perfect print quality and perfect scanning conditions rarely exist for long.
Which QR code error correction level is best for outdoor applications?
There is no single universal answer, but for most outdoor installations, M, Q, or H are the levels worth serious consideration. Level L provides the least redundancy and is usually better suited to cleaner, more controlled environments. Outdoors, that lower tolerance can become a liability because even small amounts of fading, dirt, edge wear, or surface damage may be enough to push the code past the point of reliable decoding. If the QR code is on a temporary sign in a sheltered area, M may be acceptable. If it is exposed to weather, foot traffic, cleaning, or long-term sun exposure, Q or H is often the safer choice.
The best level depends on how harsh the environment is, how long the code must remain in service, how large it can be printed, and how much data it contains. Higher error correction adds robustness, but it also increases symbol density, which means the modules get smaller unless the printed code itself is made larger. For example, a high-error-correction code on a tiny sticker may perform worse than a medium-error-correction code printed at a more generous size. The right decision is usually made by balancing durability needs against print size, viewing distance, and expected scanning devices. For public-facing outdoor campaigns, especially where reliability is more important than visual compactness, Q or H is commonly the strongest recommendation.
Can higher error correction alone make an outdoor QR code reliable?
No. Higher error correction helps, but it is only one part of a reliable outdoor QR code design. A code can have the highest available error correction level and still fail if the print contrast is weak, the quiet zone is crowded, the surface is reflective, the physical size is too small, or the material deteriorates quickly in weather. Error correction is designed to recover from partial data loss, not to compensate for every possible design or installation mistake. If the code becomes too faded, too distorted, too glossy, or too low in contrast, scanners may not detect the symbol properly in the first place.
Outdoor performance depends on a full system of choices: durable substrates, UV-resistant inks or laminates, strong dark-to-light contrast, adequate module size, proper placement, and realistic testing under field conditions. Viewing angle also matters. People scanning a sign from the sidewalk, from a vehicle, or in bright midday sun are not interacting with the code under laboratory conditions. The most reliable outdoor QR codes combine appropriate error correction with practical design margins. Think of error correction as insurance, not as a substitute for durable materials and good engineering. It improves survivability after damage occurs, but the goal should still be to minimize damage and scanning difficulty in the first place.
How do weather, sunlight, and dirt affect QR code readability outdoors?
Outdoor QR codes usually fail in predictable ways because their visual structure is vulnerable to environmental wear. Sunlight, especially prolonged UV exposure, can fade dark printed areas and reduce the contrast that scanners need to distinguish modules cleanly. Rain and moisture can weaken adhesives, cause labels to bubble or peel, and introduce warping that changes the geometry of the code. Dust, soil, pollen, road grime, and water spots can cover portions of the symbol, effectively removing data from the scanner’s view. In colder regions, freeze-thaw cycles can crack coatings or lift edges, while in high-traffic settings, abrasion and vandalism can physically remove parts of the print.
Error correction helps because it lets the scanner reconstruct some of that lost information, but only up to a point. If dirt covers a section of the code, a higher correction level may allow successful scanning where a lower one would fail. If sunlight has slowly reduced contrast over time, added redundancy may buy useful service life before replacement is necessary. Still, environmental damage tends to accumulate, which is why long-term outdoor performance depends on both redundancy and material durability. The more severe and sustained the exposure, the more important it becomes to choose suitable correction levels, enlarge the printed code, and use weather-resistant production methods rather than treating the QR code like ordinary indoor artwork.
What are the best practices for designing outdoor QR codes that stay scannable longer?
The most effective approach is to design for degradation from the start. Choose an error correction level appropriate to the environment, with Q or H often preferred for exposed or long-term use. Keep the encoded data as short as practical so the symbol does not become unnecessarily dense. If possible, use a short URL or redirect structure to reduce complexity. Print the code large enough that individual modules remain easy for phone cameras to resolve, even if users scan from imperfect angles or at a distance. Maintain strong black-on-white or similarly high-contrast color choices, and preserve a clean quiet zone around the code so scanners can isolate it quickly.
Material and placement decisions are just as important as the digital settings. Use substrates and adhesives rated for outdoor exposure, and consider UV-resistant inks, protective laminates, or direct printing on durable surfaces. Avoid glossy finishes that create glare in sunlight. Install the code where it is visible and easy to approach, but not in a position where it will collect constant splashes, heavy dust, or repeated abrasion. Finally, test the code in realistic conditions: bright sun, overcast light, different phone models, and off-angle scans. The best outdoor QR code is not simply the one that scans perfectly when first printed; it is the one that continues to scan after weeks or months of weather, dirt, and everyday public use.